
Canva is a fantastic free to use (with optional paid features) program for designing posters, booklets, business cards, and much, much more. It’s a tool that can be used by anyone from a single person marketing team to large multinational organizations with just a few clicks. If you’ve never used Canva and aren’t sure how to get started or what features are available to you, check out these beginner’s course videos here.
After you’ve learned the ins and outs of Canva, it’s time to bring your project to life; PIP Metro Indy is here to help! Check out our tips and tricks to creating a print-ready file:
Sizing Your Files
To get started with a Canva design, the first step is to choose an appropriately sized template for your project. There are endless templates for commonly printed items such as business cards, rack cards, posters, and everything in between. If you’re looking for something more unique or specific, select “Custom Size” and enter your custom dimensions using inches. Click images below to zoom in:
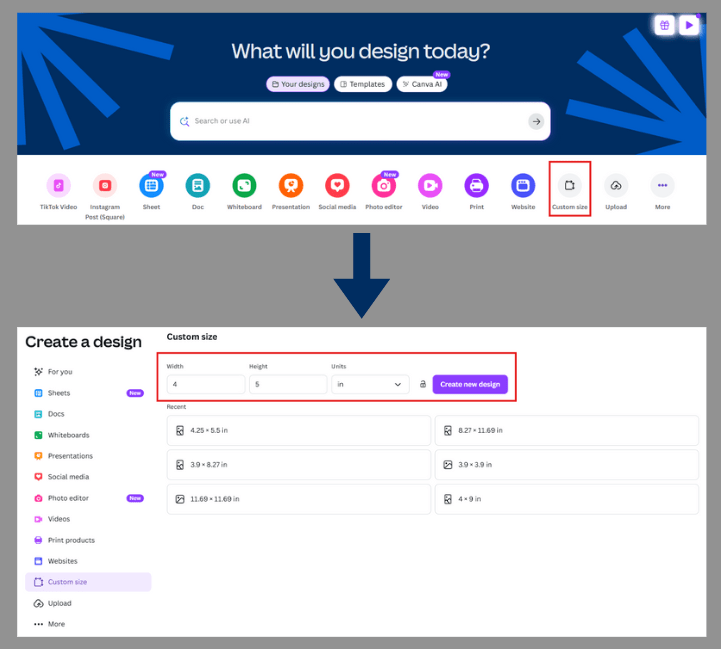
Choose a custom size on the Canva homepage before beginning your design, then enter your custom dimensions and select “Create New Design.”
PIP Metro Indy will need your files to be designed to the size you need them printed to ensure everything is scaled/sized as expected. Setting your files up to the correct finished size initially is very important! If you need help, our expert team can walk you through how to set up your files; contact us here.
Showing Rulers & Setting Margins
Next, it’s critical your text and important elements aren’t too close to the edge (unless intended), as they risk being cut off when printed. Before you begin designing your project, click “File” in the upper left-hand corner of your screen. You will then scroll down to “Settings” and ensure “Show rulers and guides” and “Show print bleed” are selected. To take it a step further, you can select “Show margins” to show Canva’s default safety margins. While these aren’t the most accurate for printing purposes due to Canva defaults — printer’s margins are generally a 1/4” from the finished edge — but these are a great benchmark for keeping an eye on where your elements fall on the page.
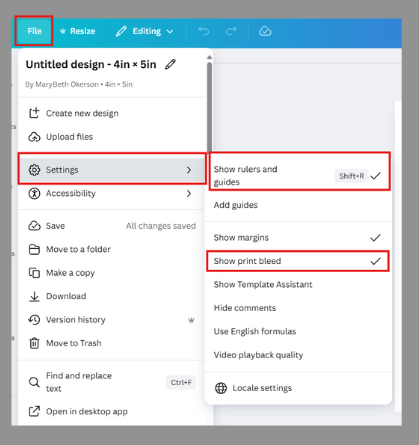
Make sure your rulers and print bleeds are showing before even beginning your design.
If you’d like to add some additional structure to your design, you can select “File” > “Settings” > “Add guides” and create a grid layout to align your text or elements into your pre-designated columns.
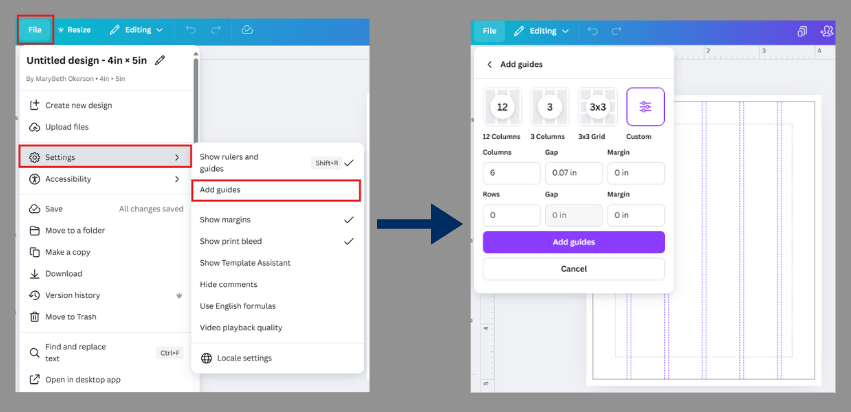
Add custom guides to your design with “Add guides” in the Settings. You can add the additional grid lines or margins based on your design needs.
Resizing Your Design
If you have created a design that is no longer the right size or if you need to adjust this design for another use, don’t worry — it can be easily resized and the elements will be automatically re-flowed to fit the new size! This is a paid feature of Canva, so if you are limited to the free version, you can share your file with our team (how-to steps are below) or contact us to see how we can assist.
To resize an existing design, click the “Resize” button in the upper left-hand menu bar. From here, you can choose from Canva suggested sizes or create a new custom size. Click on the size you would like to utilize and select the layout orientation and aspect ratio (as needed). You can then decide to “Copy & resize” meaning the design will be duplicated and an entirely new design file will be created while keeping this original one intact. Alternatively, you can select “Resize this design” and the original design file will be adjusted to the new dimensions you have selected and the original size you created will be overridden.
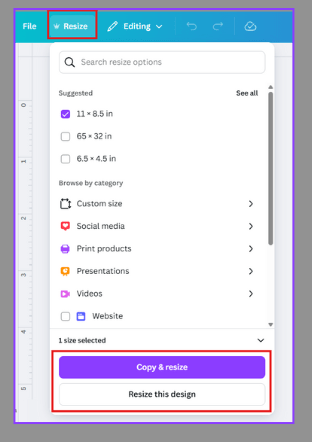
Resize your designs to new dimensions and keep a copy of the original or adjust the current art board.
Extending Your Bleeds
If your artwork has colors, design elements, or images that you want to finish on the edge of the sheet, that is called a bleed. These elements will need to extend past the black print bleed line set by Canva that you clicked on earlier. If you see any white gaps around the edges, fully extend your elements past the black line to properly set up your bleed. As a reminder, anything that is extended past the black bleed line will be cut off during the finishing process. If the bleed is not properly extended, any white areas showing around the edges will show up on your finished product due to shifting that occurs during the printing process.
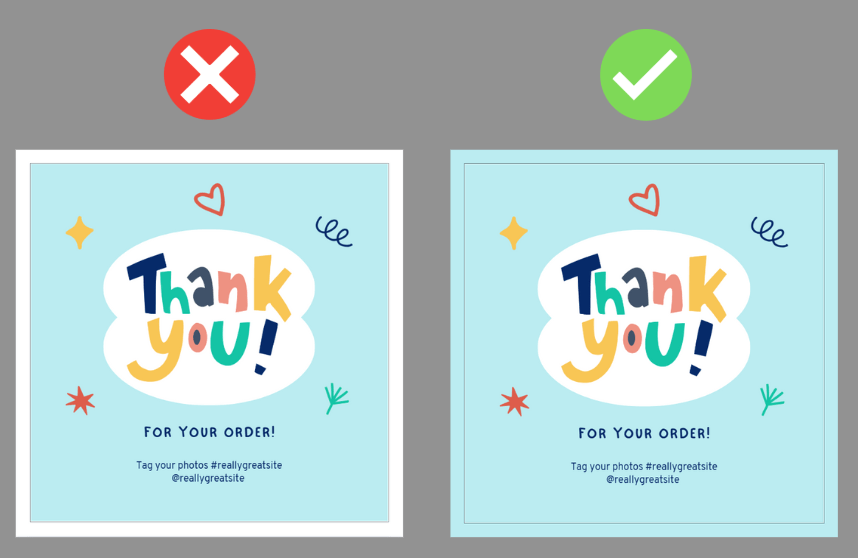
Design on the left does not extend to the bleed. The design on the right does have a properly set up bleed.
If you need any additional help extending your bleeds or setting up your design file for print, check out the Margin, Bleed, Ruler, and Crop Mark guide from Canva, or reach out to our team for additional assistance.
Share/Download Files For Print
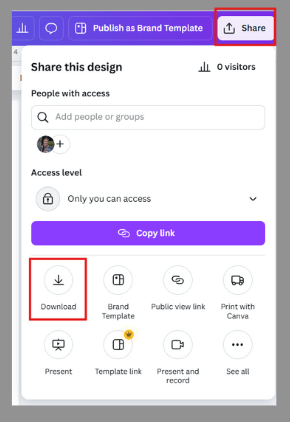
Now that your artwork is done and ready to print, it’s time to export the file and send it to us to review for production. To begin, in the upper right-hand corner of your screen, select “Share” then “Download”:
If you have the paid version of Canva, you’ll be able to follow the steps below:
If you’re using the free version, continue below to find your instructions!
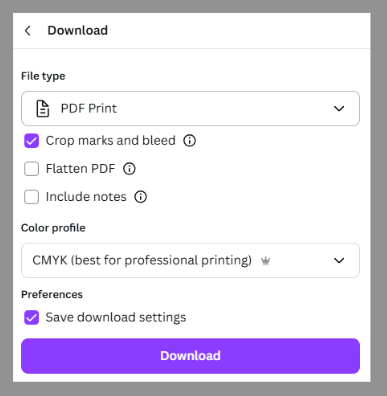
- Under File Type, select PDF Print (so designs are downloaded at high resolution).
- Check the box labeled Crop Marks and Bleed.
- If your file has multiple pages, select those you want to download (using Select Pages)
- Under Color Profile, select CMYK.
- Press Download, and Canva will generate a print-ready PDF.
Your download settings should look like this:
Your file dimensions will be larger than your intended size with the inclusion of the crops and bleeds — that’s correct!
If you have the free version of Canva, you will not be able to download your file with the CMYK color profile. No problem! You can share the file with our team and we are able to download your finished design on our end. To begin, in the upper right-hand corner of your screen, select “Share” then under “Access level,” click the dropdown to the right of the default selection of “Only you can access” and change that to “Anyone with the link” and “Can edit” (see screenshot below).
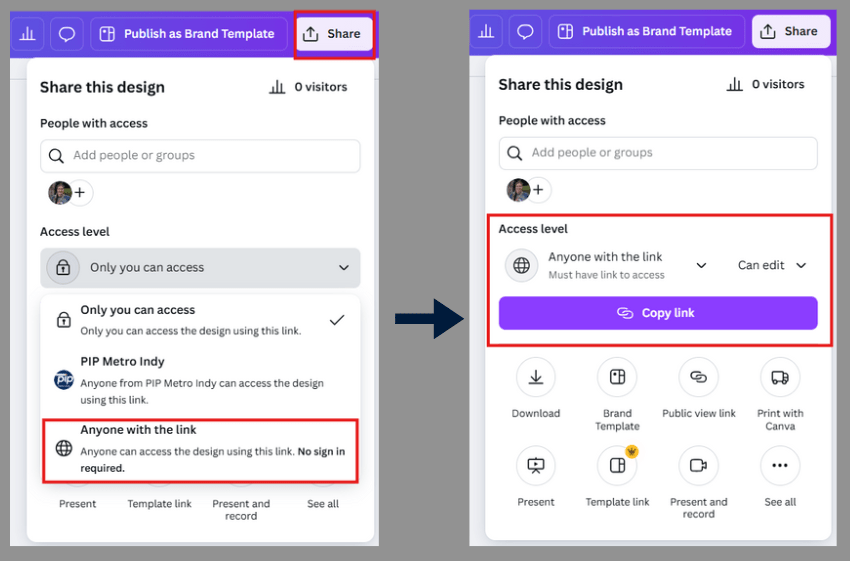
Clicking “Anyone with the link” and then making sure permissions are set to “Can edit” is the best way to share a file with us.
Once your permissions have been updated, click the purple “Copy link” button and send that link over to us in an email! You can send this to your PIP Metro Indy contact or to our team here.
That’s it! Our team can take it from here to bring your designs from the screen to a finished, printed project! Need additional help or have questions we haven’t addressed? Check out the official Canva Help Guide that addresses further details and system issues. You can also reach out to our expert team, and we can walk through many common questions and concerns to ensure your next print project is exactly what you are looking for!